
Custom forms can be designed using tools such as Microsoft Word or Adobe Acrobat. Although the form may have been saved as a PDF document, it will not necessarily include "form fields" which determine where, on the document, a particular piece of information should be placed.
Here's how you might add form fields to a form which was designed in Microsoft Word and saved as a PDF document. The examples shown here are using Adobe Acrobat but other tools such as Foxit Pdf Editor can also be used.
- Use a PDF Editing tool such as Adobe Acrobat to open the PDF document which was created in Word.
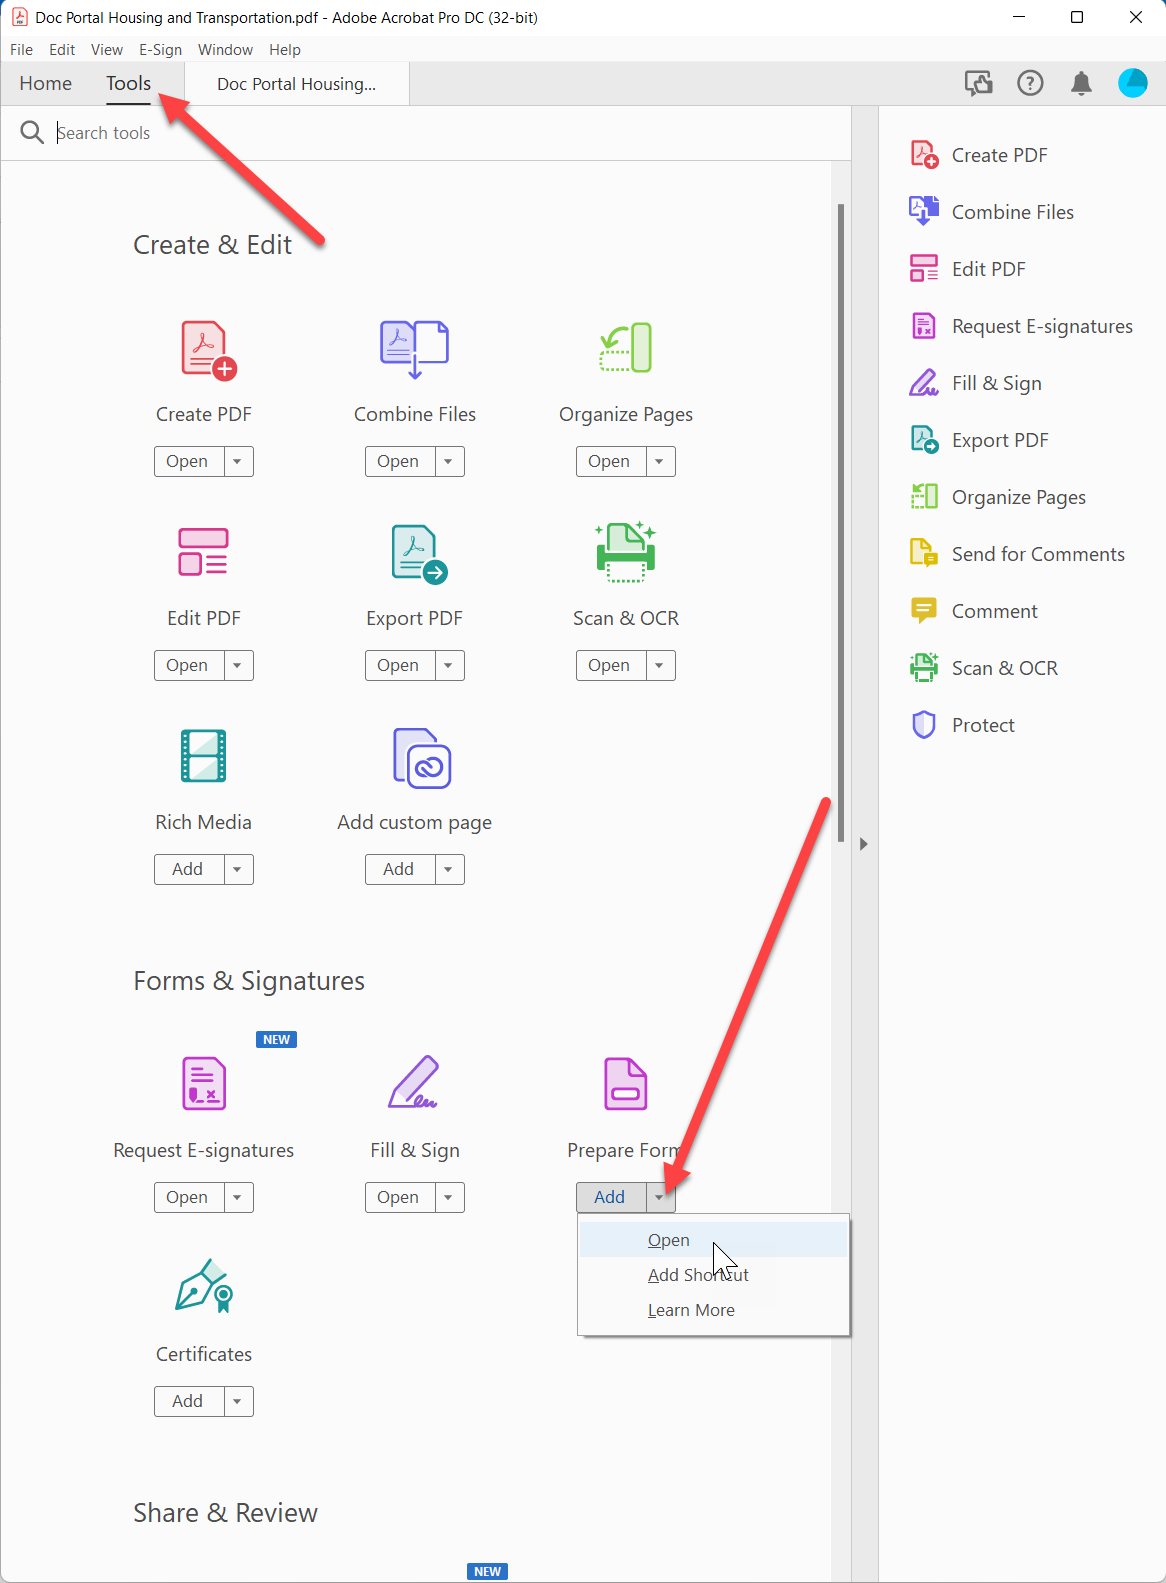
- Click the Tools option near the top of the screen in Adobe Acrobat to display the Tools Panel then click the drop-down menu button under the "Prepare Form" tool. Select "Open" and when prompted, click the "Start" button.
- Adobe Acrobat will guess where you might want fields and will create them with names corresponding to nearby text. In the following illustration, for example, Adobe created a field called "Print NameNombre" based on the text which was found near the underline. It also created fields such as "I accepted free company" that you really don't need since you will not be merging anything into that spot on the page.
You can rename, modify and delete the auto generated fields and can also create your own with the tools on the "Prepare Form" menu. Just click on the field name in the panel on the right hand side to change it or right-click on the field itself to display a menu of options.
Tip: The right-hand panel can be collapsed by clicking the right arrow button as highlighted below.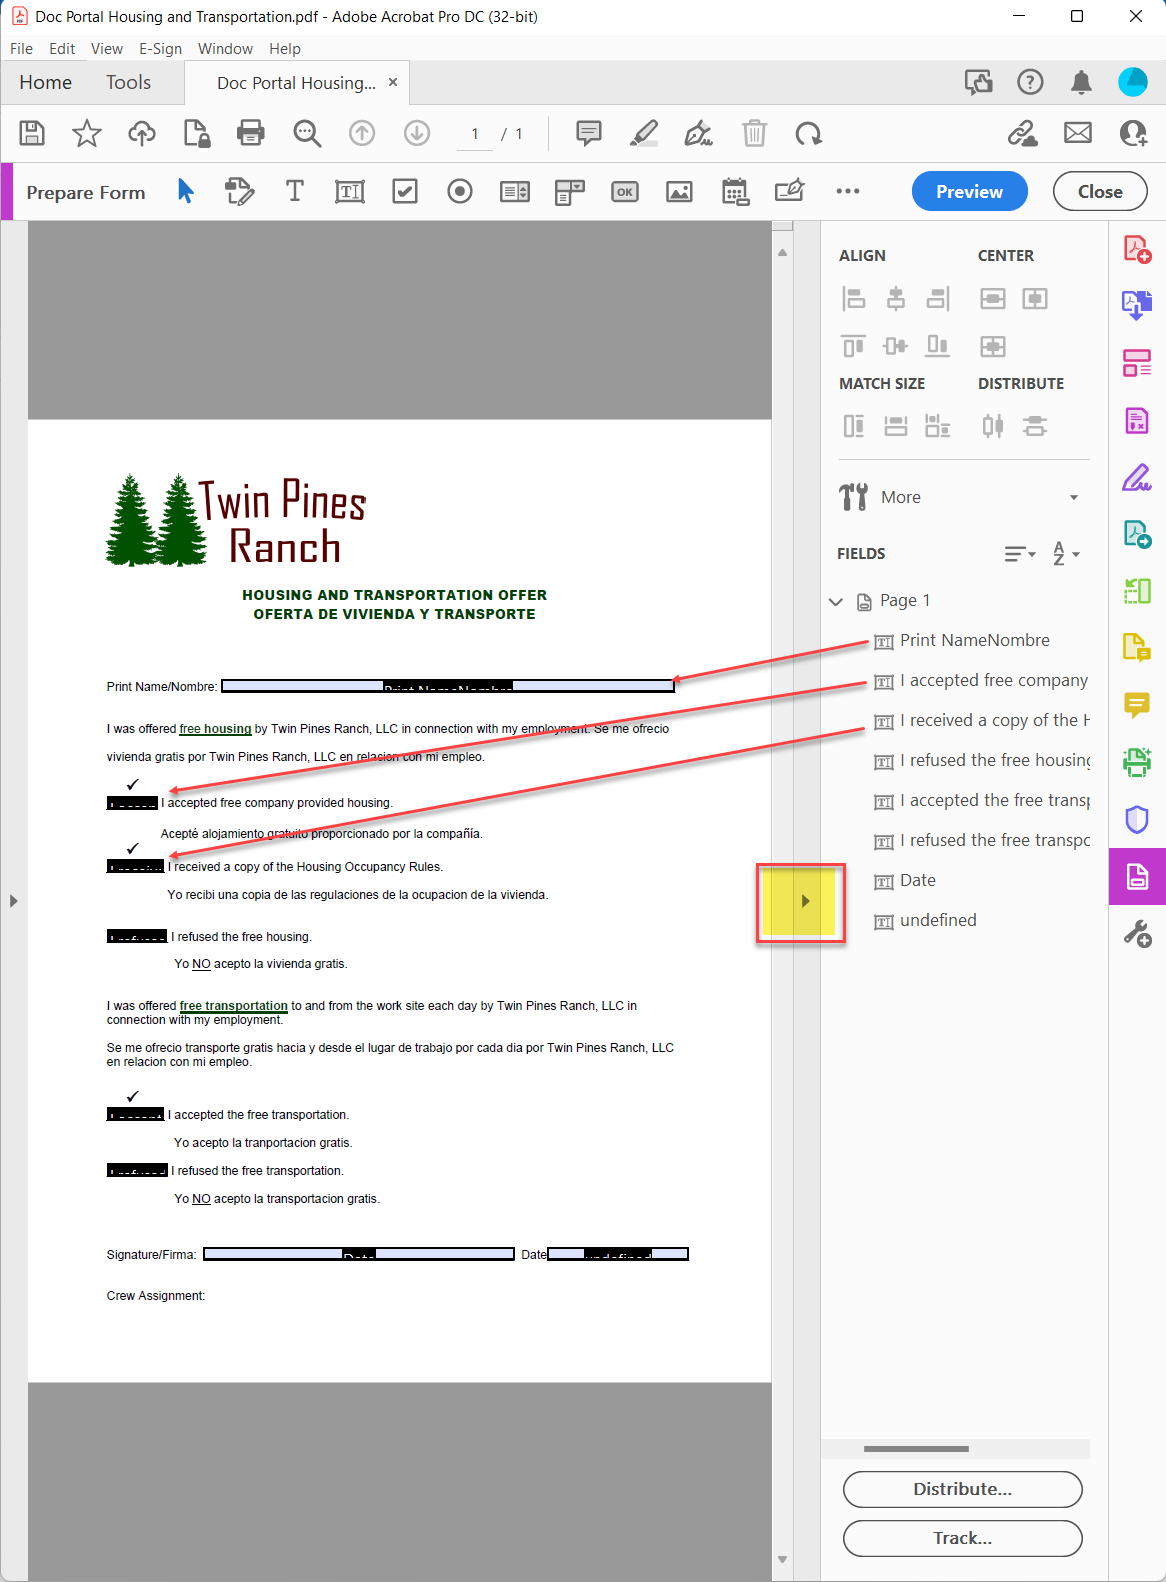
-
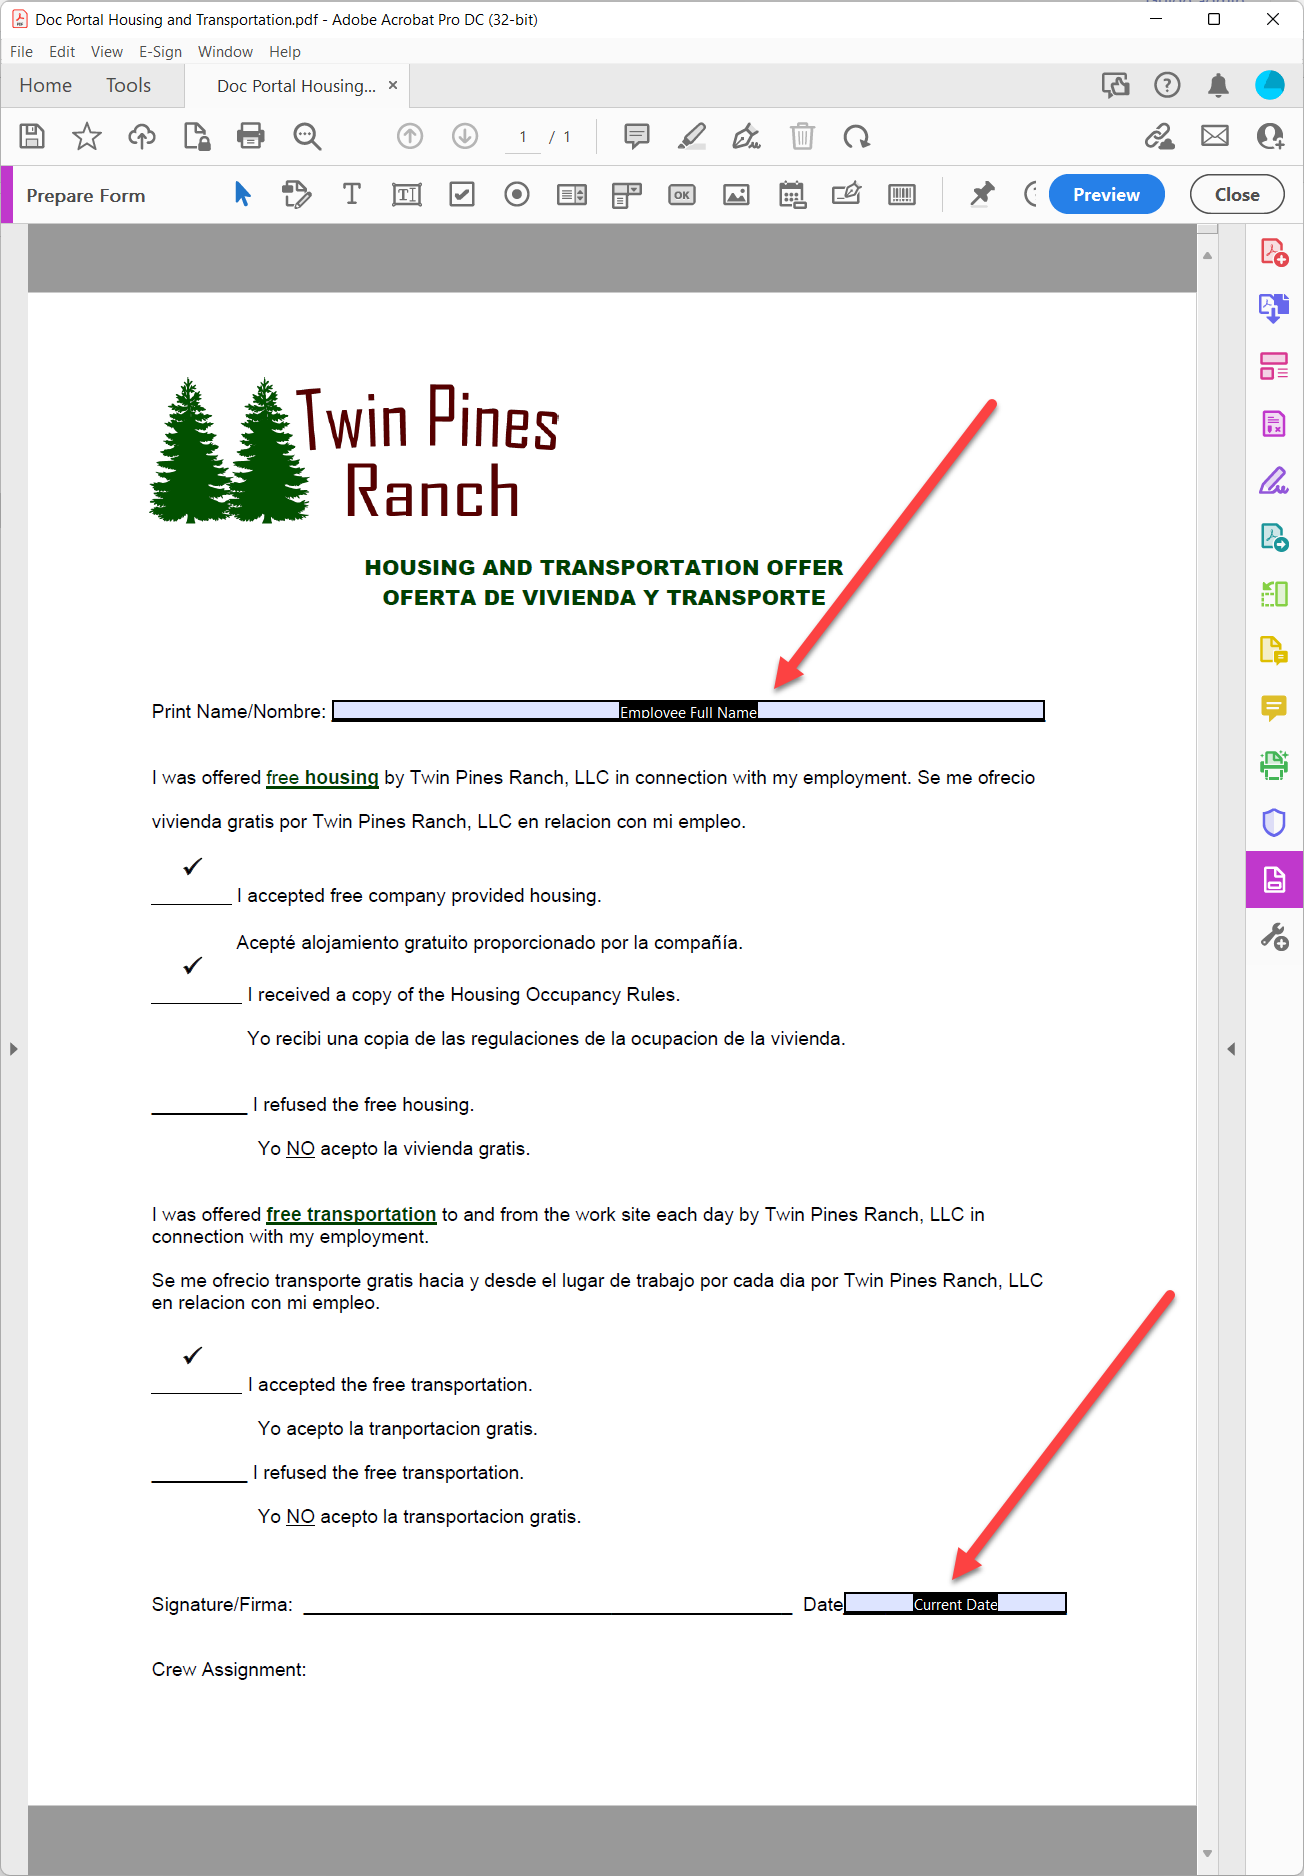
In the illustration below, most of the auto generated fields have been deleted and the remaining two fields have been renamed to "Employee Full Name" and "Current Date". The field names are not important to Document Portal but you will use them when you upload the Form into Document Portal and map them to employee data entry fields.
-
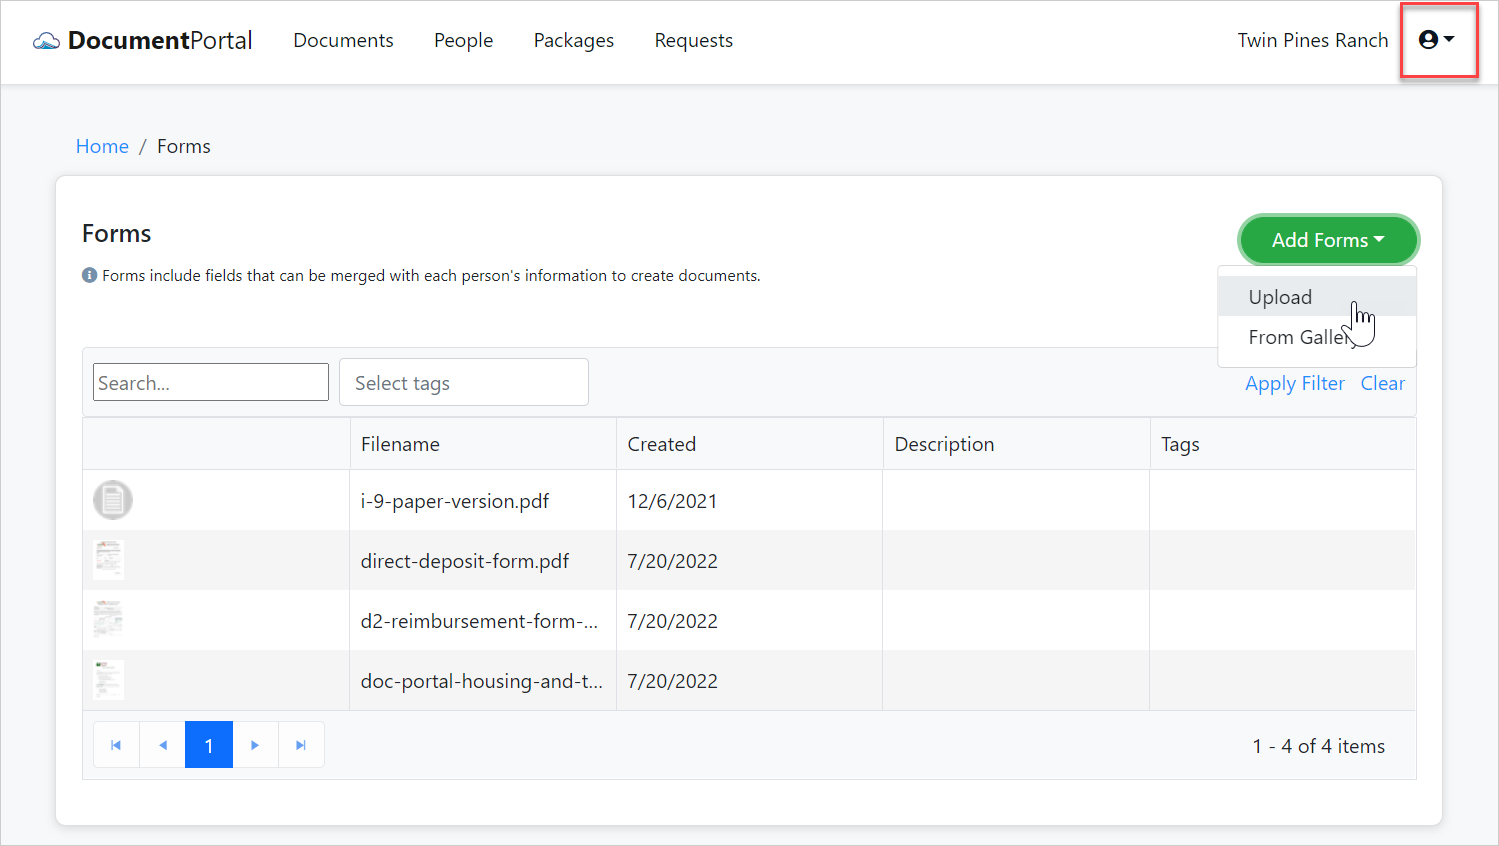
Once the form document has been saved by Adobe Acrobat, it can be uploaded into Document Portal using the "Upload" option on the Forms List as illustrated below. Also, if the Form already exists within Document Portal, it can be uploaded to replace the existing file using options on the Form Detail screen.
-
Once the Form has been uploaded, Document Portal will look for the fields that were created with Adobe Acrobat and attempt to map them to data Document Portal's own data entry fields. As illustrated below, it "guessed" that the Employee Full Name field in the Pdf document should be mapped to Document Portal's own Full name calculated field and also that the Current Date Pdf field should be mapped to Document Portal's Current Date calculated field.
Tip: The Update Mappings option can be used to manually specify mappings if Document Portal is unable to correctly map the Pdf Form Field to one of its own Data Entry Fields.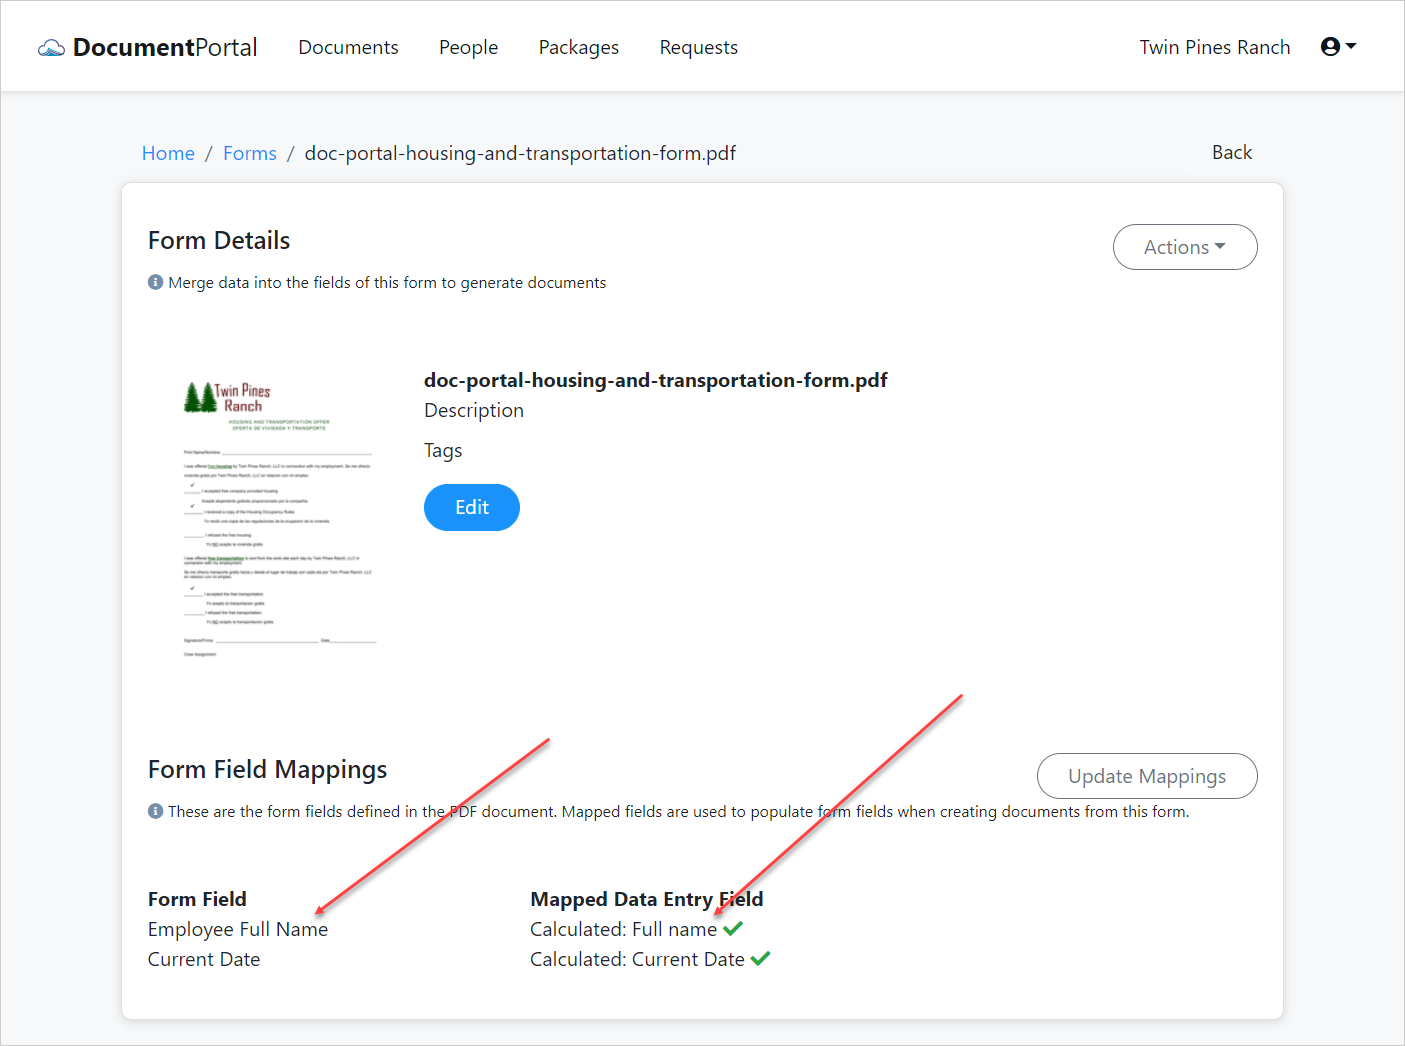
Once the form has been uploaded and mapped, it can be used to generate documents which are filled out with the information for selected people.
Comments
0 comments
Please sign in to leave a comment.